I recently sold my Paul C Buff Einsteins and picked up two of the Flashpoint Xplor 600 HSS TTL strobes from Adorama. The reason I sold the Einsteins was simple. I wanted, and needed, high speed sync. If you’re new to flash photography, high speed sync is a technology that allows you to surpass your camera’s maximum sync speed. Most cameras have a maximum sync speed of around 1/200 of a second. Being able to surpass that means a couple things. One, you can freeze action with a faster shutter speed. Two, by increasing your shutter your are able to bring down the ambient light, thus creating a more dramatic scene. I love that look. Third, HSS allows you to shoot with wide open apertures during the middle of the day without the use of nd filters over your lens.
The Xplor 600 comes in a few different variations. They released them with the option of purchasing the strobe with or without TTL. TTL was one of those features that I wasn’t sure I wanted to pay an extra $250 for. I had never used TTL with studio strobe before, but didn’t really need it because my subjects were usually in a studio, and the lighting and distance never really changed. Just so you know, TTL stands for “through the lens”. It is a technology that reads the scene, and determines the flash output to fire on your subject. If done right, it can remove the need for using a flash meter. It also allows you to shoot a moving subject, because it will adjust the power of the strobe based on how far away the subject is from the flash. To be honest, I simply went on the advice of others, and picked up the TTL version of the Xplor 600.
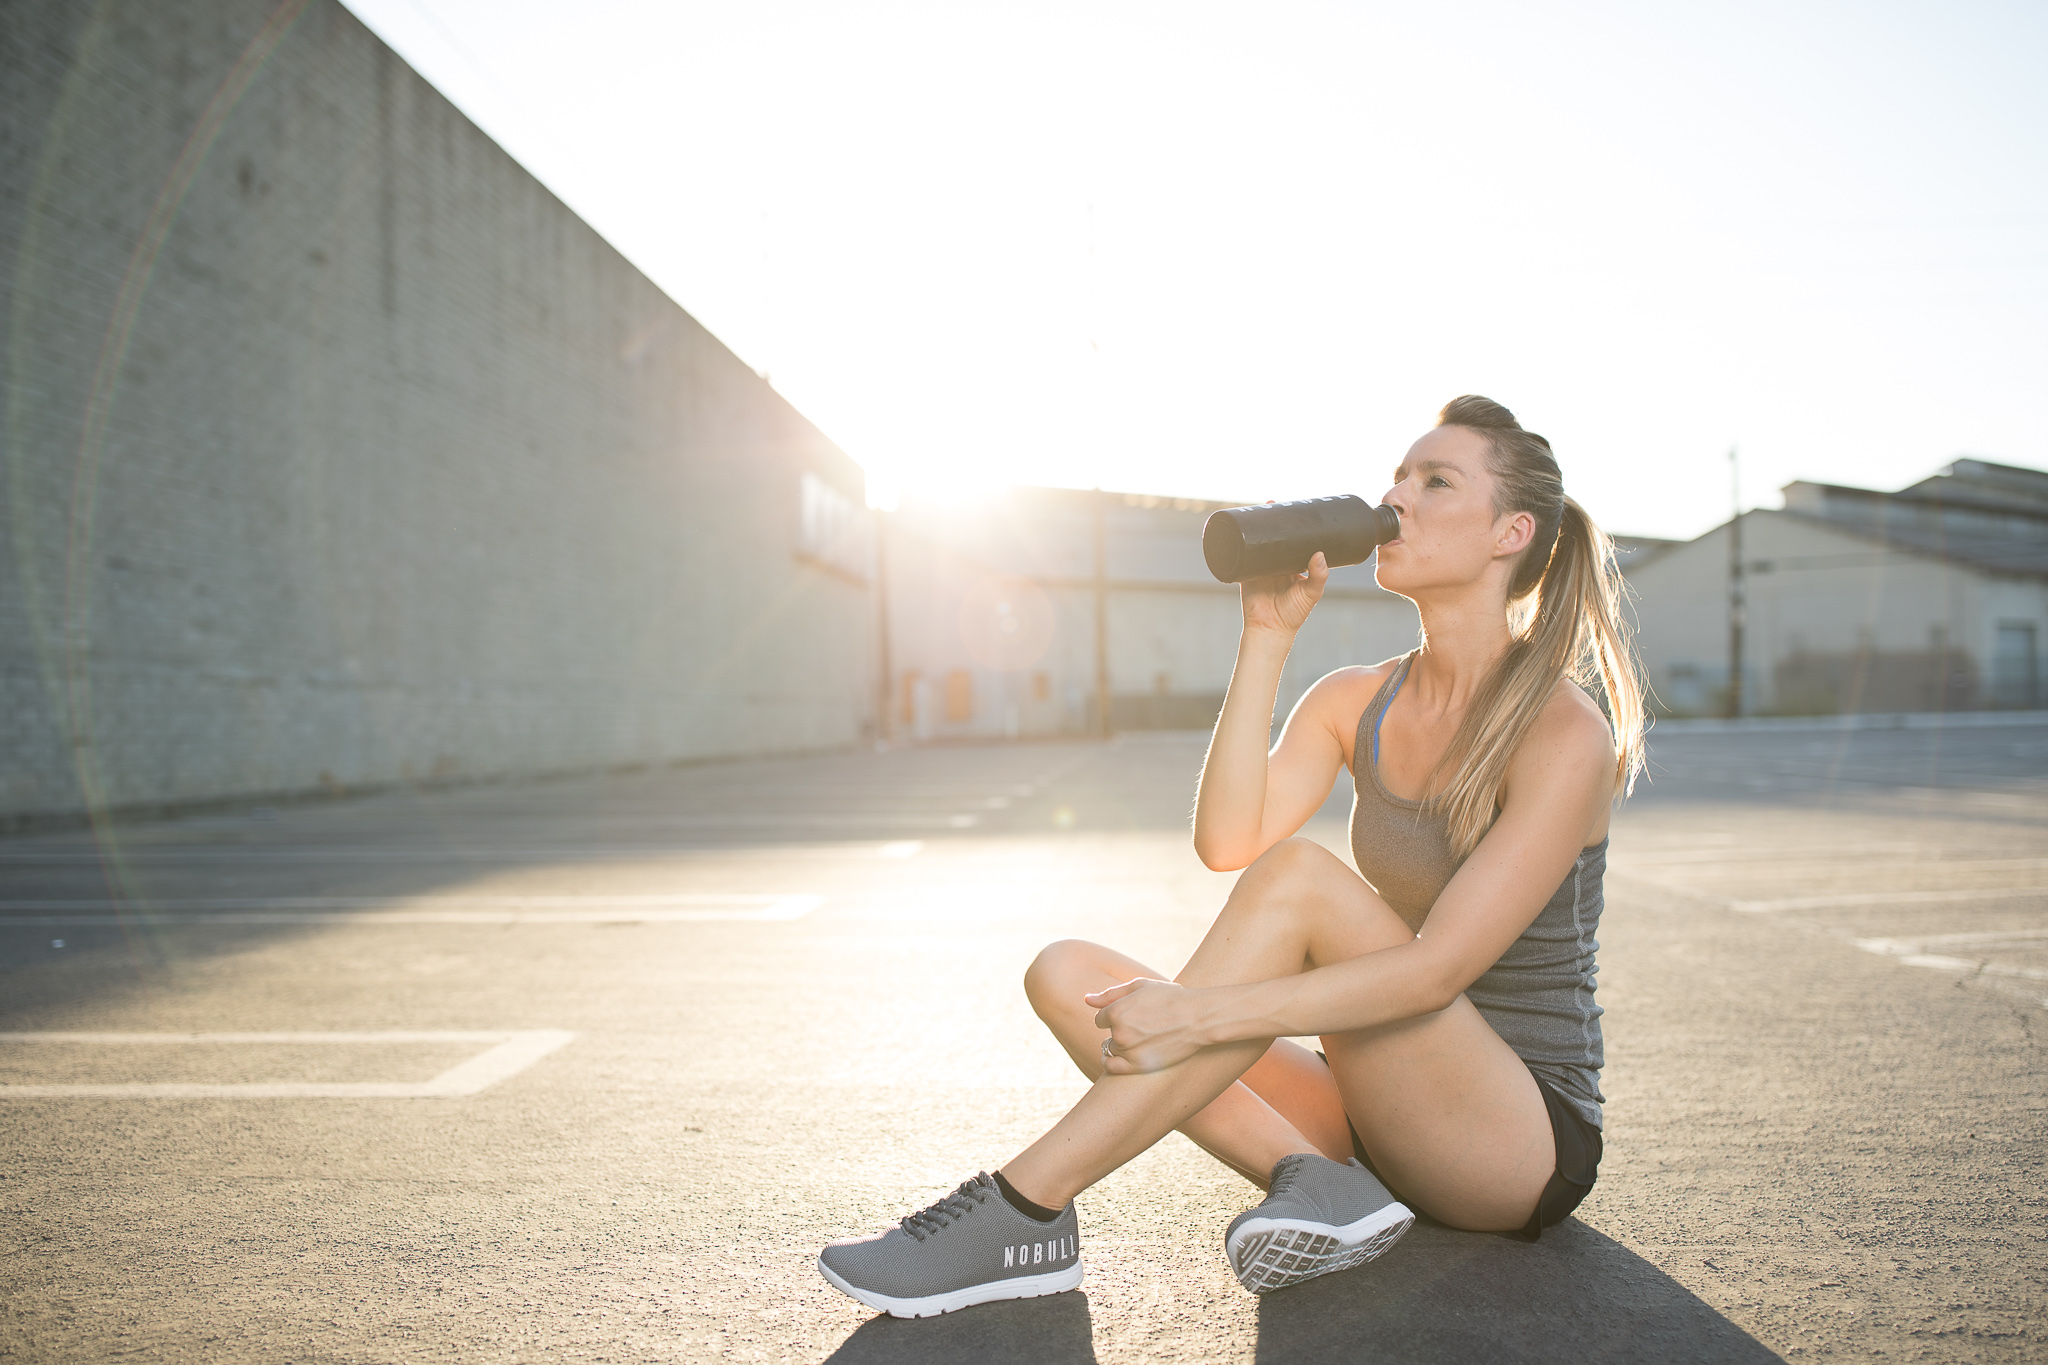
With this new sorcery in hand, I was ready to shoot our first lifestyle photo shoot. We were supposed to shoot at a local junior college track, but me being the man that I am, I didn’t check the schedule. Of course there was a football game, and we would not be able to shoot there. We decided to shoot at an empty parking lot next door, which turned out very well actually.
For the “Water Break” shot, it was extremely easy to get the results that I wanted. I attribute this to two things. First, a good understanding of how shutter speed affects the results when using high speed sync. Next, the new HSS and TTL technology that I was shooting with.
I shot the image with the Canon 1DX Mark II and Canon 35mm f/1.4L II lens, set to f/2.2. I also used an ISO of 100 to ensure the cleanest image possible.
When shooting with flash, shutter speed affects the ambient light. A faster shutter will lower the ambient, and a slower shutter will raise the ambient. I shot a few test shots and determined that I liked the ambient light with a shutter speed of 1/640. I created a strong ambient light that mixed well with the scene, and looked natural. A shutter lower than that would have washed out the scene, and a shutter faster than that would have lowered the ambient and created a dramatic look that I wasn’t looking for in this shot. She was well exposed, but not over lit. The TTL did a great job in this case, and gave me a great baseline for editing.
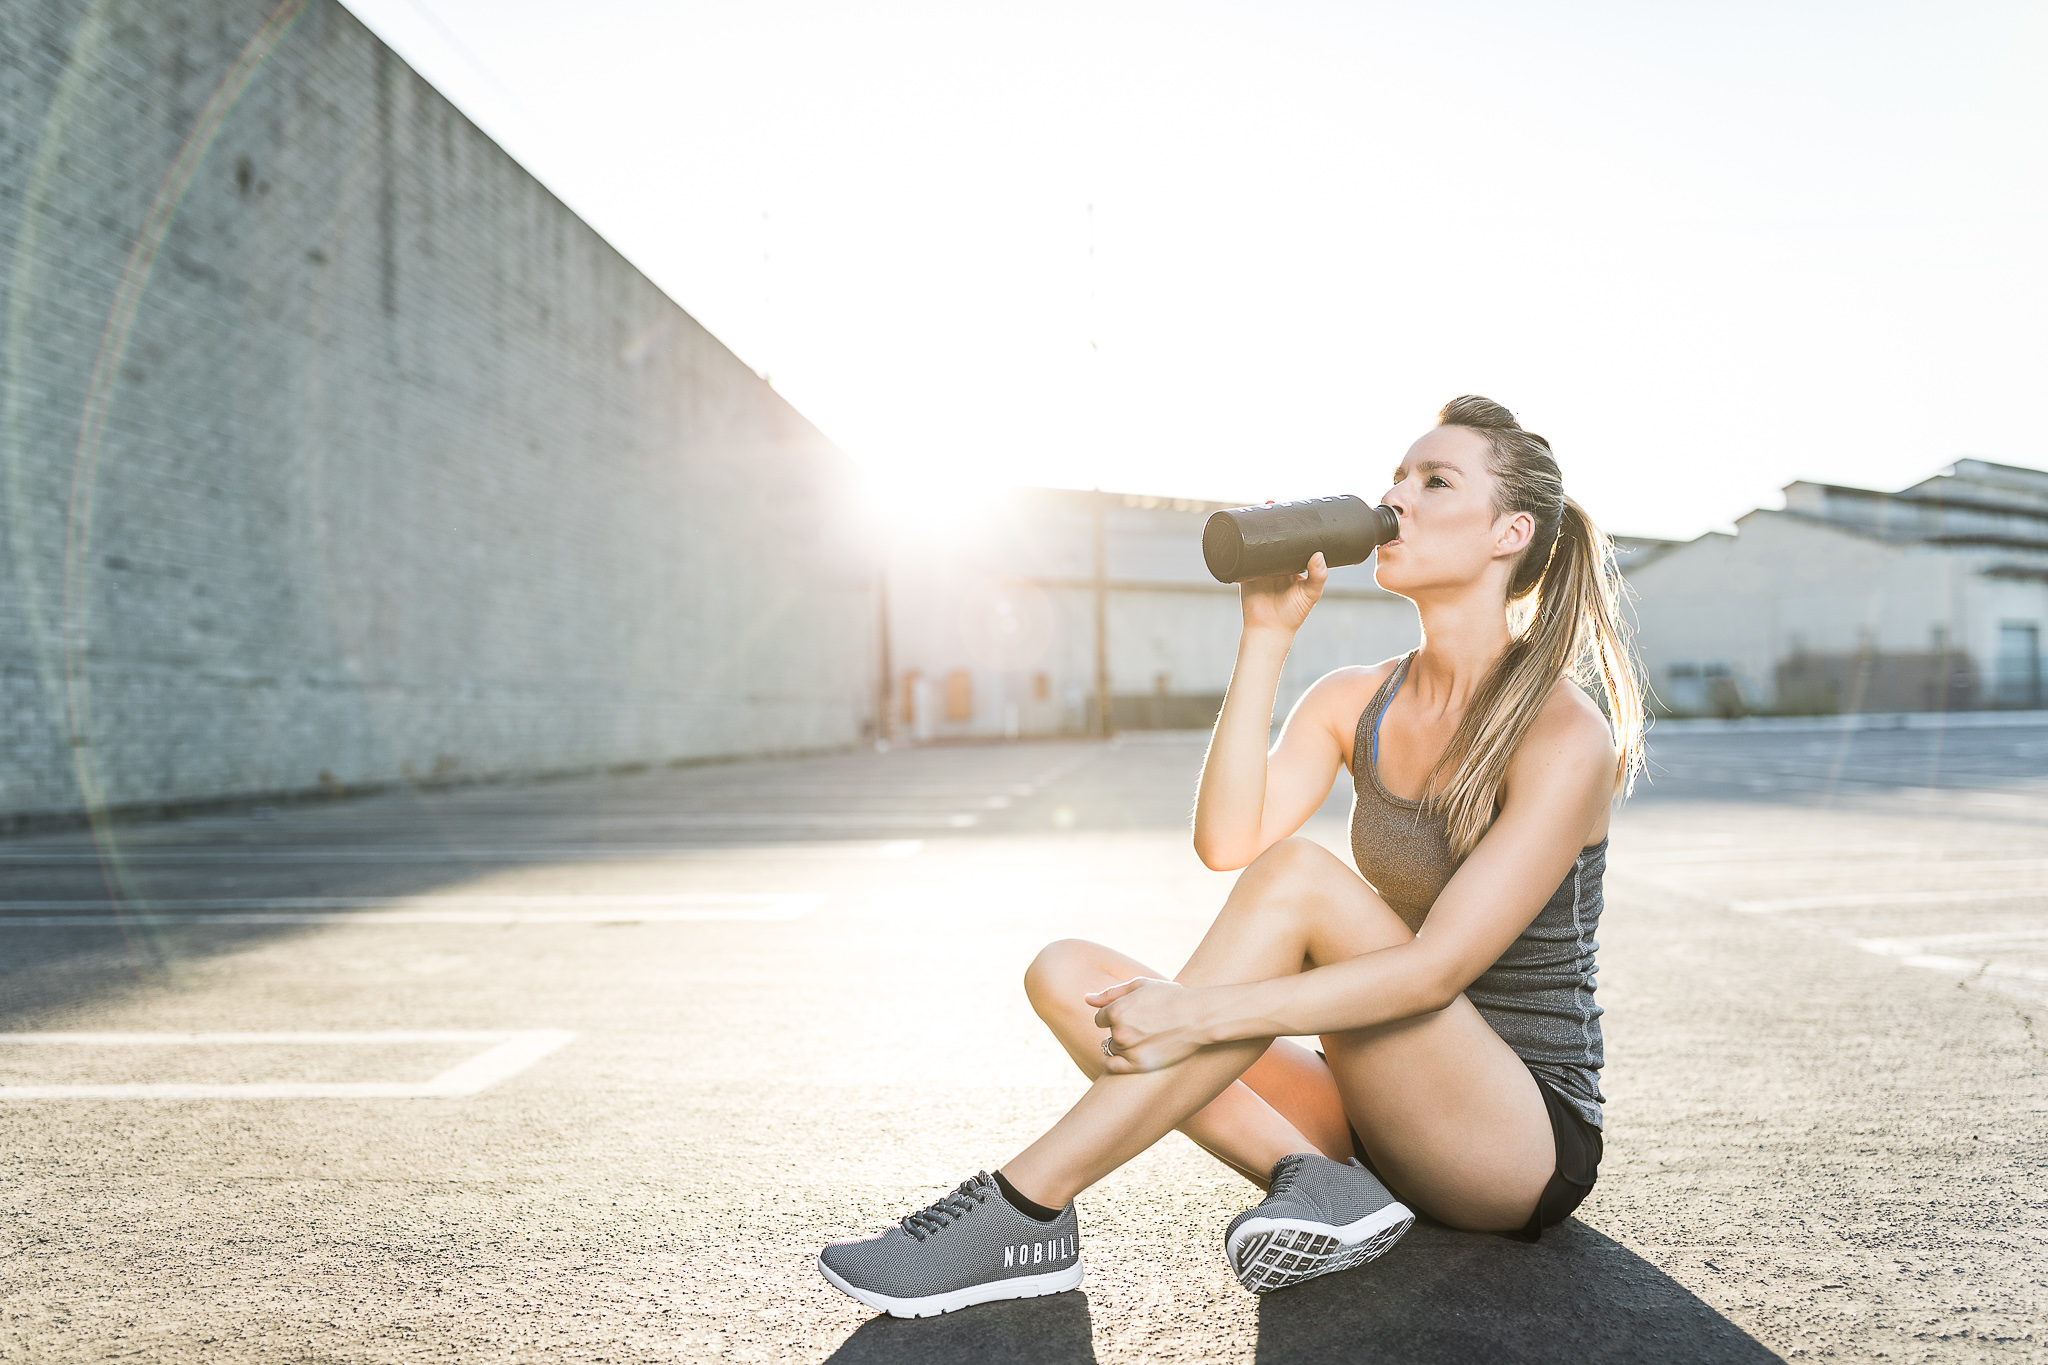
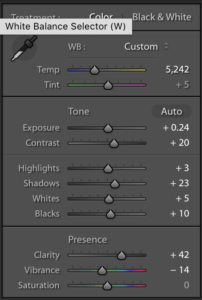
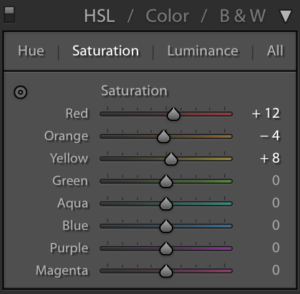
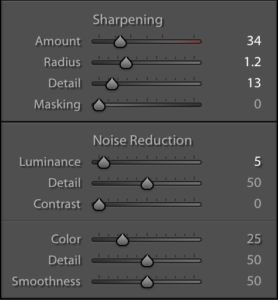
I’m not the quickest editor. This shot took me about 30 minutes to complete. I adjusted the highlights and whites a bit upwards, and also brought up the shadows and black. For sports and fitness images, I really like to increase the clarity a bit, which adds to the overall look in my opinion. I brought down the vibrance a bit, which brings down her skin tones hey little, since I thought they were A bit too orange for what I was going for. In sports and fitness images, I like the colors to be a bit more muted. I’ve been adjusted the saturation of the Reds, oranges, and yellows to my liking, sharpened it a little bit, and brought it into Photoshop.
Inside of Photoshop, I cleaned up the ground and background a little bit and removed some objects that were distracting to the image. I then softened her skin just a little bit to where it looked natural still, But even without her tones. I then dodged and burned to accentuate the highlights and shadows that were already there. After that, I put a small gaussian blur on the entire image, and then selectively sharpened certain aspects like the shoes, shorts, shirt, lips, eyes, eyebrows, and hair. To me, that helped her stand out even more from the background. I also accentuated the sun just a tiny bit.
Then I was done. It was a nice clean edit, with no super advanced retouching techniques used. Below is the before and after. Take a look, and please comment if you have any questions.
Slide the image below to see the before and after.